Dentron Cosmetic
Imaging: Installation Guide
1)
Begin by inserting your Dentron Cosmetic Imaging CD-ROM into your PC. Copy the contents of the drive to a location on your hard
drive (preferably C:). Navigate to the directory of…
\DENTRON Imaging\Driver\HASPUserSetup.exe
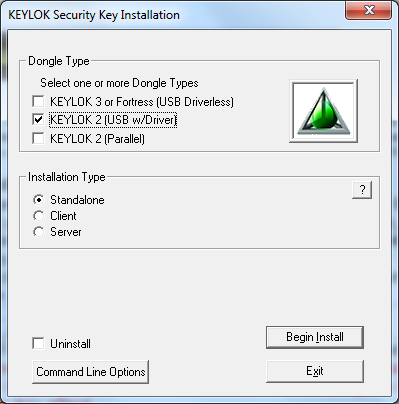
2)
After running this file, you should select
KEYLOK 2 (USB w/Driver), and installation type Standalone.
3) You
should then be prompted with a window notifying you to disconnect the USB
Dongle as the driver installs.
Disconnect the flash drive until asked to reconnect it. If prompted by
Windows with a Device Driver
Installation Wizard, click next to continue.

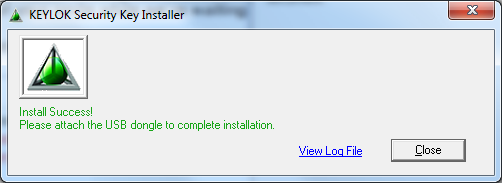
4)
After the installation has completed, you should
be greeted with a message that KYELOK (usbkey) USB driver is now ready to use.

5)
Reconnect the flash drive and click close on the
following prompt.
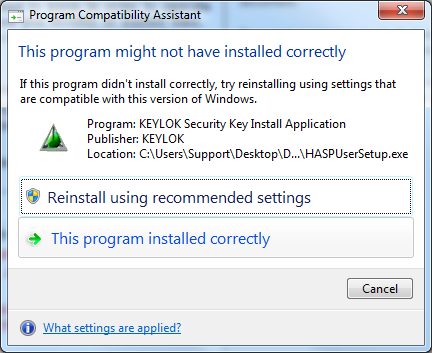
6) If
prompted with a message from Windows about this
program might not have been installed correctly, select the second option
‘This program is installed correctly.
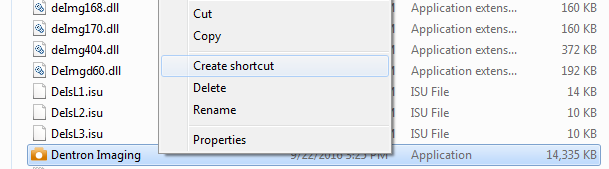
7)
Navigate to the previous directory, the folder
of DENTRON Imaging, and find the Dentron Imaging executable with the orange camera icon.
Right click the Dentron
Imaging application, and select Create
shortcut. Then, navigate to your windows desktop, right click again, and
then select Paste.
8)
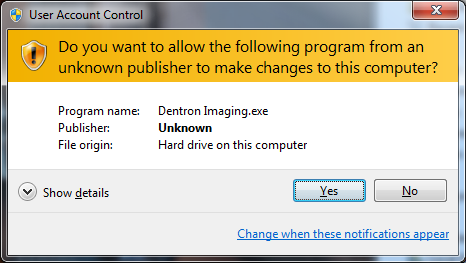
You should now be able to use Dentron Cosmetic Imaging. If prompted
by Windows User Account Control, select
the Yes button to allow the program
to run.