Cosmetic Imaging
The Cosmetic Imaging toolbar
The Cosmetic Imaging module can be added to DentalEye Lite or PRO.
The functions are mainly meant for use to manipulate color images to let the
patient see what a particular treatment can do for her/him.
The toolbar can be docked to the side of the workspace or dragged
to a free-floating position.
Place the cursor to the left of the cosmetic toolbar, the cursor
turns into two crossed arrows.
Press left-mouse and drag the toolbar to the workspace area or
dock the toolbar at the workspace's edge
The cosmetic toolbar can also be docked to another toolbar, e. g.
the X-ray toolbar.
 The Clone tool
 The Clone-function is used to copy an identical part from an area
on the image to another area. The idea is to enable the user to pick up color as
well as structure from an area and use it on another area. E.g. make a tooth
wider or longer, painting new soft tissue over a tooth that is to big.
1 Click the Clone button on the Cosmetic tool
bar.
on the Cosmetic tool
bar. 2 Press right mouse button and drag to mark an area, a circle
appears determining the clone (pick up) area. Release the right mouse button
when the area is marked.
3 Place the crossbar where the image shall be painted. Press the
left mouse button and paint with the mouse as you can see the pick up circle
moves the same way as the crossbar.
If needed release the button and select another pick up area.
4 When ready click the Reset button on the common tool bar, to end
the Clone manipulation. The manipulations remains in the image.
on the common tool bar, to end
the Clone manipulation. The manipulations remains in the image.
on the common tool bar, to end
the Clone manipulation. The manipulations remains in the image.  The Marker tool
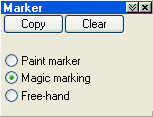
 The Marker tool is used to create a selection by defining an area
of the image. E.g. a computer does not now what is teeth on an image that must
be defined by the user.
There are three tools for marking an area:
Paint Marker - paints the area to mark.
Magic Marker - automatically marks the teeth area inside a
rectangle.
Freehand - mark an area by drawing aborder around it.
Paint Marker
Click the radio button Paint Marker in the dialogue box
Press the left mouse button and paint the area to be marked. The
selected area is marked in light blue. Erase by pressing down the right mouse
button.
Click the double down arrow button in the title bar and the
dialogue box displays different Shapes and Sizes that can be selected.
Magic marker
Click and drag the mouse diagonally over the tooth area to form a
rectangle that covers the area to mark.
Release the mouse button, the selected area becomes a light blue.
Do it over again in smaller portions if the teeth were not properly marked. Or
add to the marked area by using the Paint marker tool.
Freehand marker
Draw a border around the area to be marked. When the border
surrounds an area it will be defined as marked and colored in a blue
shade.
Work with the marked area
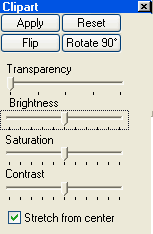
Click the Copy button and the selected area becomes a layer over
the actual image. The layer can be:
Moved with drag and drop technique.
Mirror imaged by clicking the Flip button.
Rotated in 90° segments by clicking the Rotate button.
Turned by aiming on the area and press down the right mouse button
and move the mouse.
Resized by draging a border or a corner of the area.
Transparency makes the layer transparent and thereby easier to fit
onto the original structure in the image.
Brightness, Saturation and Contrast can be changed to make the
layer blend in.
Stretch from center should be marked if the layer or a clipart
smile is to be resized equally to the right and the left. If a tooths is marked
and a diastema is closed this function should be off since the tooth shall only
be enlarged in one direction.
Click the Apply button and the layer will become a part of the
image. The old selection can be moved and placed to a new area.
_____________________________________________________________________________
Note: Clicking the Reset button during the Marking
selections, clears the image and the dialogue box is closed. The selections
appears again when clicking the Marking button if no other manipulations have
been done in between.
button during the Marking
selections, clears the image and the dialogue box is closed. The selections
appears again when clicking the Marking button if no other manipulations have
been done in between. _____________________________________________________________________________
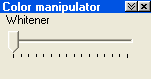
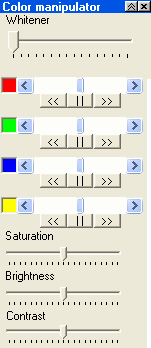
 The Color manipulator
 Click the icon and a slide bar is displayed. Drag the slider
towards the right to whiten the marked area.
If more specific tools are needed click the double down arrow. Now
you can play with a variety of tools in a very detailed way.
 The diffuser tool
 When manipulation is made on an image this tool is used to smooth
out edges and unatural borders on the image. You can select the size of the
diffuser from the drop down list. Then press down the left mouse button and
paint over the area to be smoothed out.
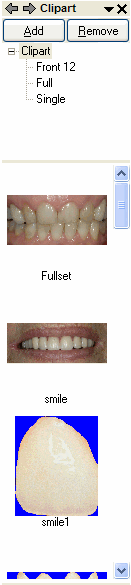
 Clipart
 Clipart is a library with images that can be used in the patient
image. The library could either be purchased as an add on module or built on
your own images and copied into the directory ..\Program files\DentalEye\Clipart
and subdirectories under Clipart.
The Clipart image can either be imported as is and moved and
resized into the right position or it can be imported into a marked area.
A typical situation when a Clipart is imported directly to an
image is when a tooth needs to be replaced with a new. Just click the Clipart
button and choose the image from the Cliparts in the taskpane. Resize and move
it into the right position.
Another situation is when a complete new smile is needed, in this
case it is better to mark the area inside the lips with the Free-hand marker
and then import the Clipart full smile image and resize it inside the marked
area, it will never spill over the lips.